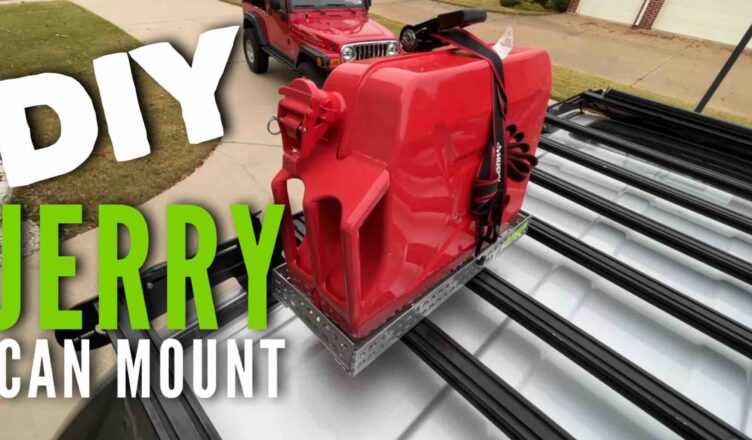
Jerry cans give you extra fuel in the field so you can stay out longer before returning to civilization. Carrying them around can be a challenge though – putting them inside your vehicle is a guaranteed way to smell like gasoline, and it can pose a fire hazard. Mounting a jerry can on the outside of your vehicle is a better approach but requires a sturdy mount.
In this video, we create a DIY jerry can mount using hardware commonly available at your local home improvement center. The end product is a sturdy jerry count mount that we can easily mount (and remove) from our roof rack whenever we need it for the off road trails or extended overland trips.
DIY Jerry Can Mount Video
Materials:
- 2 – Slotted angle bar, zinc coated: 36” x 2-1/4” x 1-1/2”
- 4- 5/16” x 3/4” hex bolt, stainless steel or zinc coated
- 8 – 5/16” flat washer 4 – 5/16” nylon nuts
Material Cuts:
Measure your jerry can to ensure an appropriate fit. These measurements worked for my jerry can but may not work for yours:
- 2 – 20” long pieces
- 2 – 7” long pieces
Assembly:
After cutting your sections, assemble at the corners using 5/16” hex bolts and nylon nuts. Use a washer on both sides. Attach to your roof rack using appropriate hardware Place the jerry can in the mount and secure using a ratchet strap or other securing device